Pages

Showing posts with label onion. Show all posts

Monday, February 10, 2014

Bean Dip


Last week's Superbowl had absolutely no meaning to me. I'm a fair weather Patriots fan at best, so this whole football thing was maybe more about the commercials and food than the actual game. Well, scratch that. It was entirely about the commercials and food. I made bean dip from this recipe to bring to my friends' party, since I don't like showing up empty-handed. I placed it on the counter with a bag of chips without any fanfare and walked away... within an hour, the dish was scraped completely clean.

It's not the prettiest dip, but it's delicious and really quite cheap. You can easily make this as spicy as you'd like, and I'm sure you could add things like finely chopped bell peppers, other small vegetables, or even some ground meat. Think of it like the inside of a taco, in dip form.

Fast, easy, and really dang good, I highly recommend this for your next gathering. A group of hungry boys demolished this, but it could easily be halved for a slightly less ravenous crew.


You will need:
 -8oz (1 package) of cream cheese, softened
 -1 cup of sour cream
 -2 (16oz) cans of refried beans
 -taco seasoning mix, to taste
 -hot sauce, to taste
 -1/8 cup of chopped fresh parsley
 -1/2 of an onion, chopped
 -2 cups of cheddar/monterey jack cheese

Oven temp: 350˚F

You'll start by taking your softened cream cheese and fully mixing it with the sour cream. I took a picture for this but it looked completely nasty. You just want them to combine to make a nice, smooth texture. I'm sure you get it--you don't want any weird clumps of straight cream cheese hangin' out.


Add literally everything else and mix together very well. I ended up adding the majority of the taco seasoning as well as a fair amount of Tabasco and Frank's Red Hot sauce. Overall, probably a few teaspoons of each sauce. I wanted to make sure that the flavor of the beans didn't completely overpower the other tastes in the dip.

Maybe self-explanatory, but make sure everything is well combined and mixed. You want an even distribution of all the components. Who ever wants to bite into a mouthful of straight parsley?


Transfer to an oven-proof receptacle. I used a 9" cake pan, but you could definitely use a 9" x 13" pan to have a thinner layer of dip.

Top with cheese and pop into the oven for twenty or thirty minutes, until the cheese is melted and starting to brown.


Remove from the oven and serve hot with a fat handful of tortilla chips. You could even dip crunchy vegetables, or slather this onto a burger. The options are endless! I was hoping I would have some leftovers to put into a breakfast burrito the next morning, but unfortunately, I couldn't.

When football starts up again in a few months, I'll definitely be thinking of this for a crowd-pleasing dip. So easily customizable to your tastes, not too messy, and inexpensive! Just make sure you get a few bites before it all disappears.

Pin It Now!

Thursday, October 17, 2013

Roasted Vegetables

News flash: I love vegetables. Like, I'm having a love affair with vegetables at the moment. Raw, roasted, sautéed, I will eat them like they're going out of style. And since the temperature here in LA dropped (marginally) last week, I decided that it was officially fall, and time to roast some veggies.


Roasting a pan of vegetables is nothing new for me. There have been times at home where my mom and I roast a few pans and stand over the finished product, fishing out the best bit of parsnip or the nicest morsel of zucchini. Feeling nostalgic and sweater-weather oriented, I went to the grocery store and stocked up.

A great thing about roasting vegetables is that you can choose almost any vegetables that you'd like. My only advice is to go for hardier vegetables, since they'll hold up to the roasting better than, say, a tomato. Or a cucumber. You catch my drift. Yeah?


You will need:
 -1/2 an eggplant (mine was a medium-ish one)
 -2 sweet potatoes
 -1 red onion
 -1 head of garlic
 -1 cup of brussels sprouts (approximately 10 sprouts)
 -2 cups of broccoli
 -1/4 cup of olive oil
 -salt, to taste
 -pepper, to taste
 -5 shakes of dried basil
 -5 shakes of dried oregano

Oven temp: 375˚F.


Obviously, this is super customizable. You can add carrots, parsnip, zucchini, potato... the list goes on and on! However, this is what my store had, so that's what went in. Boom, easy as that.


We'll start with the garlic. Mmm, garlic. Roasting garlic is a life skill, I believe, and it's so easy that everyone should know how to do it. Start by chopping the top 1/2 inch off of your head of garlic. All you want is for each clove to be exposed.


Next, place the cut garlic onto a sheet of tin foil. Pour a solid glug of olive oil onto the garlic, making sure you're evenly covering each clove. You don't want to drown the head though! You'll probably pour at maximum about a tablespoon of oil on.


Now take the edges of the tin foil and make a little airtight hat over the garlic. The idea here is to steam/roast the garlic at the same time. What'll happen while the garlic cooks is that it will become super soft, deliciously fragrant, and wonderfully gentle in flavor. Put it in the oven along with your vegetables and leave it there for about an hour. Check every now and then to make sure it's not burnt (highly unlikely), but make sure you seal it back up after you've snuck a peek!


It will look like this when it's done. It will shrink in size and darken in color. Just squeeze the garlic out of the skin and you're ready for action!


Now for the main attraction! It's extremely easy to roast vegetables. All you need to do to start is to chop everything into rough chunks. I leave the broccoli as is, slice the brussels sprouts in half, and the onion into ninths (thirds then thirds again). Throw it all into a large ziploc bag.


Add your 1/4 cup of olive oil, salt, pepper, basil, and oregano. Then close the bag tightly (you do NOT want oily vegetables flying willy-nilly over your kitchen. Trust me on that one) and shake it on up. You want to get the oil and spices evenly distributed over the vegetables. Shake it up, then shake it more.


Now, dump the vegetables out of the bag and onto a baking sheet. You don't need to grease the sheet or anything, since the vegetables have their own oil. Give the sheet a good shake to settle all the vegetables, then you're good to go!


Pop these beauties in the oven, along with your little garlic bomb, for about thirty minutes. Take them out at this point and stir them around, making sure that each bit is getting flipped or turned so it gets evenly cooked. Then, put the vegetables back in the oven for fifteen or twenty minutes more. Garlic will stay in for another half hour, for a total cook time of one hour.


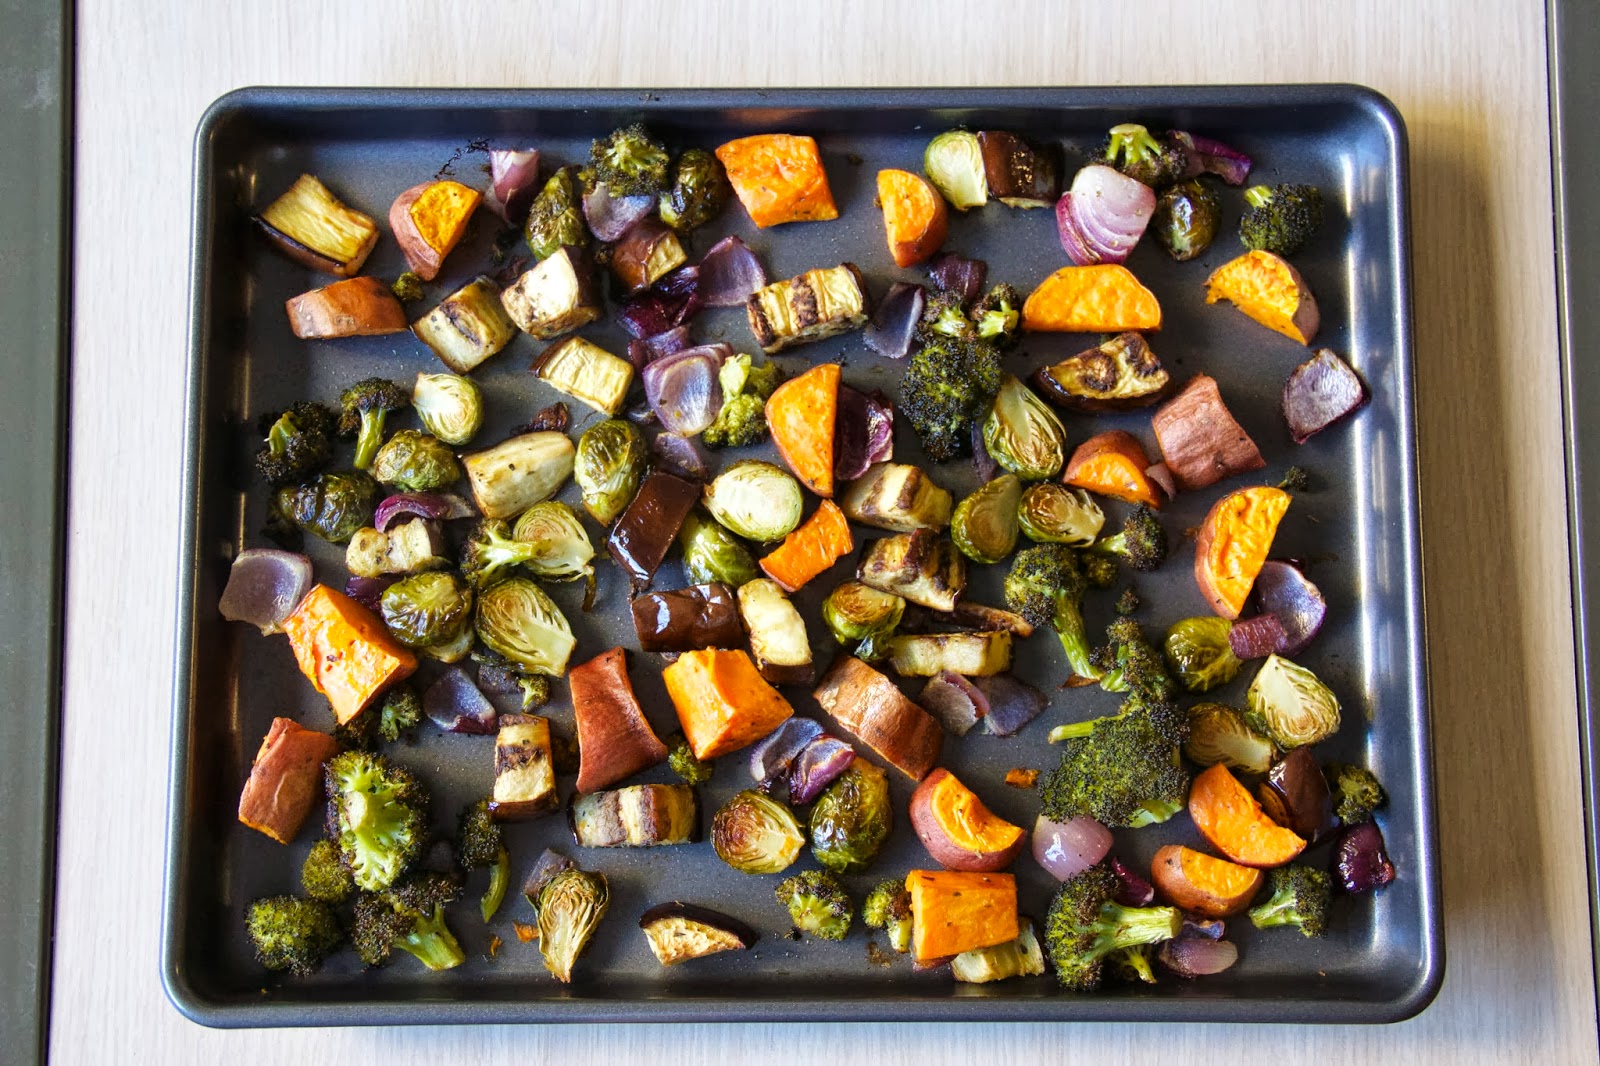
You'll know the vegetables are done when a fork inserted into the sweet potatoes goes in smoothly with no resistance. Soft the whole way throughout! The broccoli florets should be a little crispy and there should be some color on everything.


Just like old times, I stood barefoot in my kitchen eating sampling straight from the pan. And man, are these good. There's something amazing about roasting vegetables... they get beautifully tender and sweet and so flavorful. I made a batch on Sunday for lunches from Monday to Wednesday, and this batch should get me through Saturday's lunch. They're delicious, filling, and perfect for those fall days.

All in all, roasted vegetables take about an hour to make. You can really chop the vegetables haphazardly and just throw them into the pan. I did homework while I waited for these to cook, and once they were cool enough, I threw them into a tupperware container for Thursday's lunch. Simple and so, so yummy!

My parents are coming out to visit next week so I may whip up a batch of scones for their visit. I've also had cakes on my mind lately so we shall see where that takes me...

Pin It Now!